IOS Setup and IOS App Development Guide
This section explains the setup of the iOS development environment and the build process for your React Native application. For more detailed steps on the Android build process, please refer to the Android Setup and Build Guide section.
Prerequisites
- MacOS and Xcode: Ensure you have the appropriate version of MacOS and Xcode installed for app development.
- Project Repository: Pull the necessary code repository from GitHub. (GitHub Desktop is recommended for non-developer users.)
- Node.js, npm, and Yarn: It is recommended to download and install the LTS (Long Term Support) version of Node.js and npm from https://nodejs.org/en/download/. Then install yarn globally:
npm install --global yarn - Project Dependencies: Inside the project folder, run the following command in the terminal to install dependencies:
yarn install
Installing Required Tools
- Install Homebrew: Run the following command in the terminal to install Homebrew:
/bin/bash -c "$(curl -fsSL https://raw.githubusercontent.com/Homebrew/install/HEAD/install.sh)" - Install CocoaPods: Use Homebrew to install CocoaPods:
brew install cocoapods
Version
On iOS, the VersionCode is updated automatically. Therefore, before building, it is sufficient to ensure that the VersionName information is correct. Each new production release should have a new version number.
As a reference for Android:
- Version Code: This is a unique identifier for Android and must be incremented with every build.
- When moving to a production release, the version number should be updated and the Version Name should be incremented.
- The version number used in the project, especially in config files containing iOS version information, should be updated manually.
This helps prevent confusion between versions and ensures smooth distribution processes.
Building the Project
- Navigate to the
iosdirectory inside the project folder and open Xcode there (e.g., by runningxed .). - Sign in to your Apple account within Xcode.
- When native packages are added or updated, first update JavaScript dependencies by running in the project root directory:
yarn install - Then update pod dependencies by running in the
iosdirectory:pod update - Then, perform the following steps:
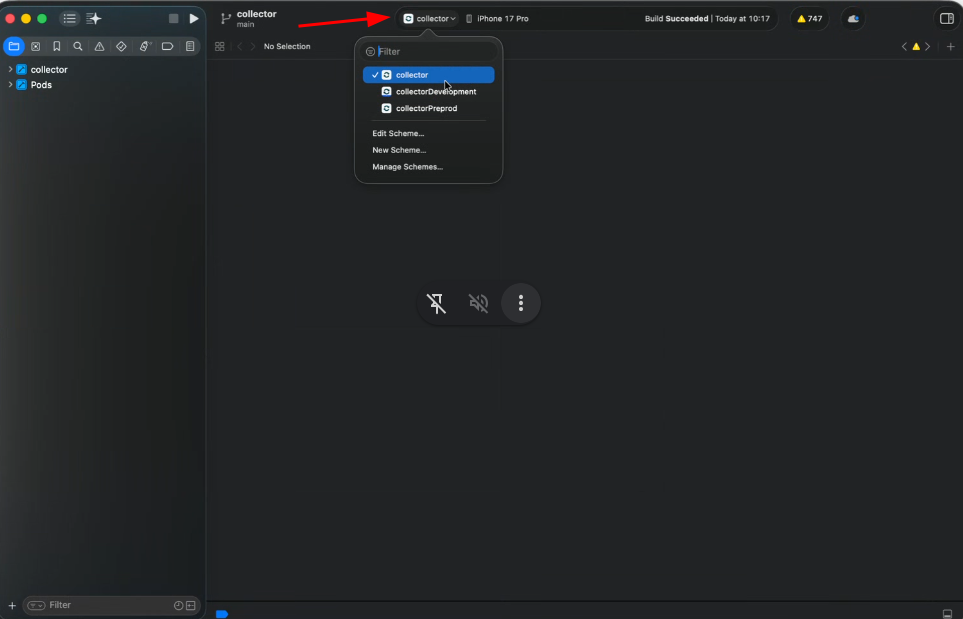
- After opening the project, select your app.
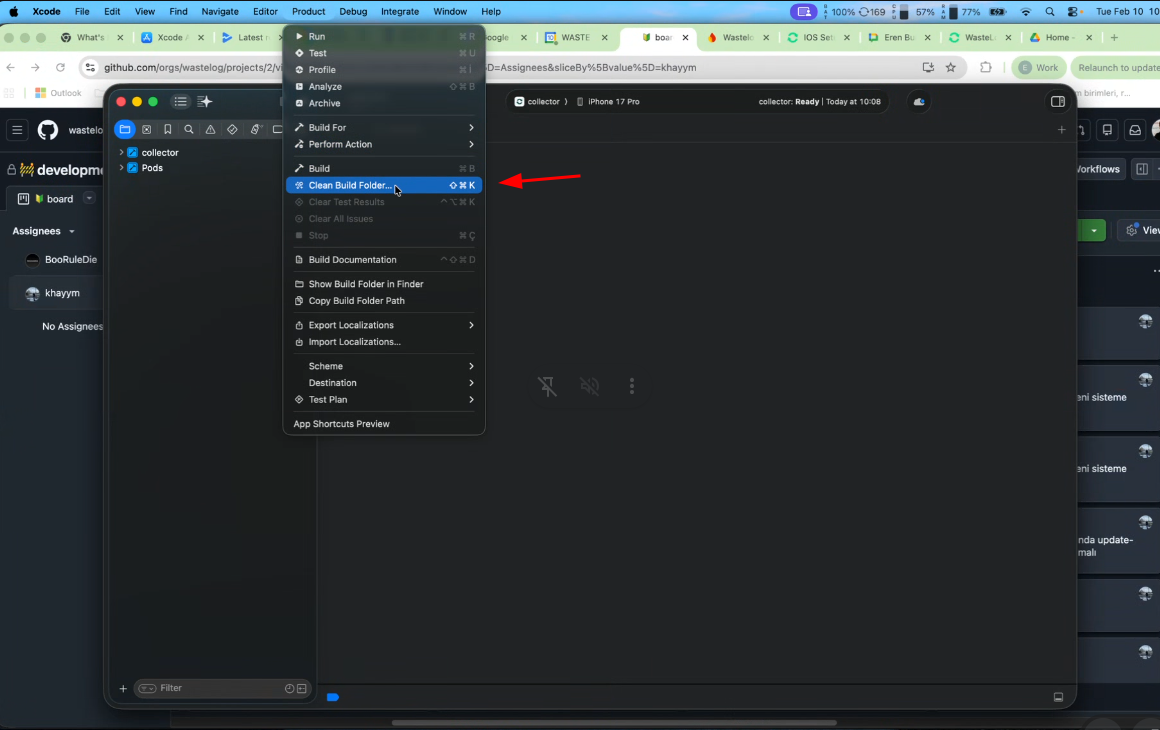
- From the menu, choose Clean Build Folder to prepare a clean build environment.
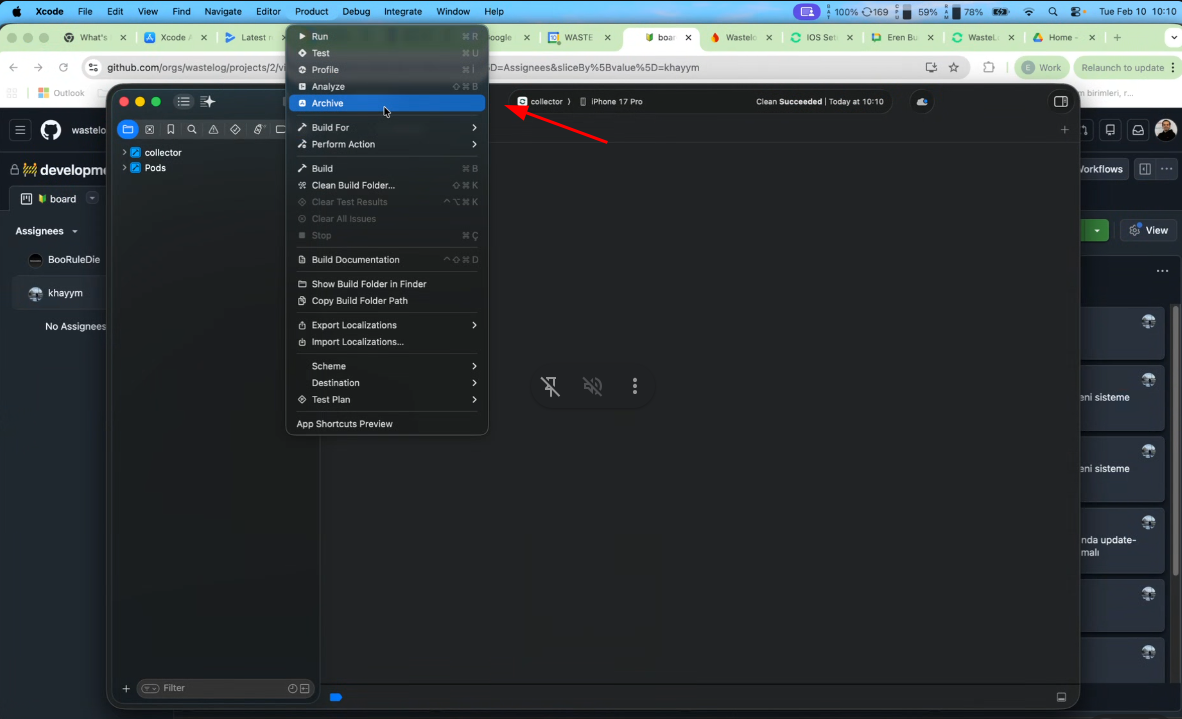
- Archive your app.
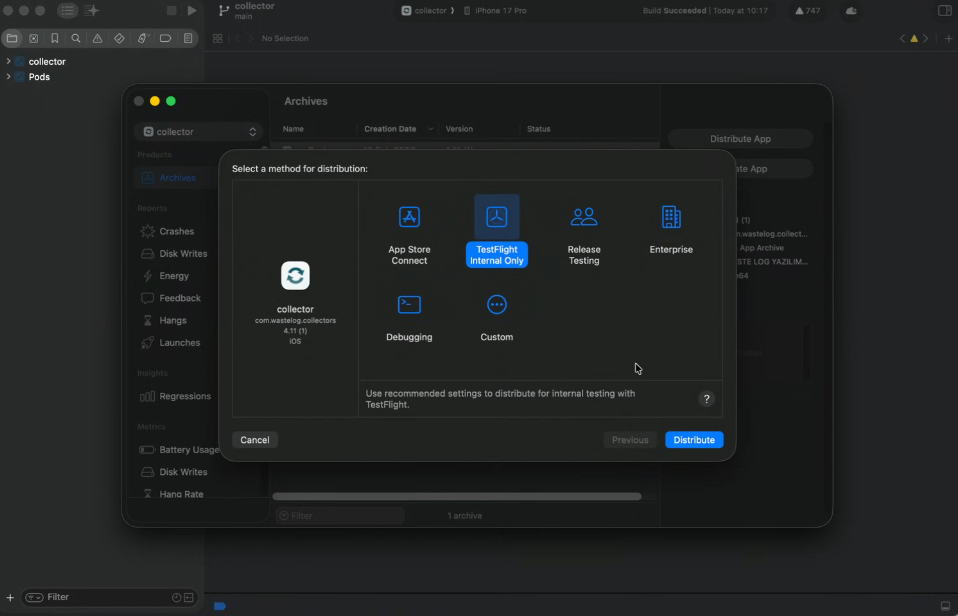
- If the operation is successful, the distribution window will open. Click the Distribution button.
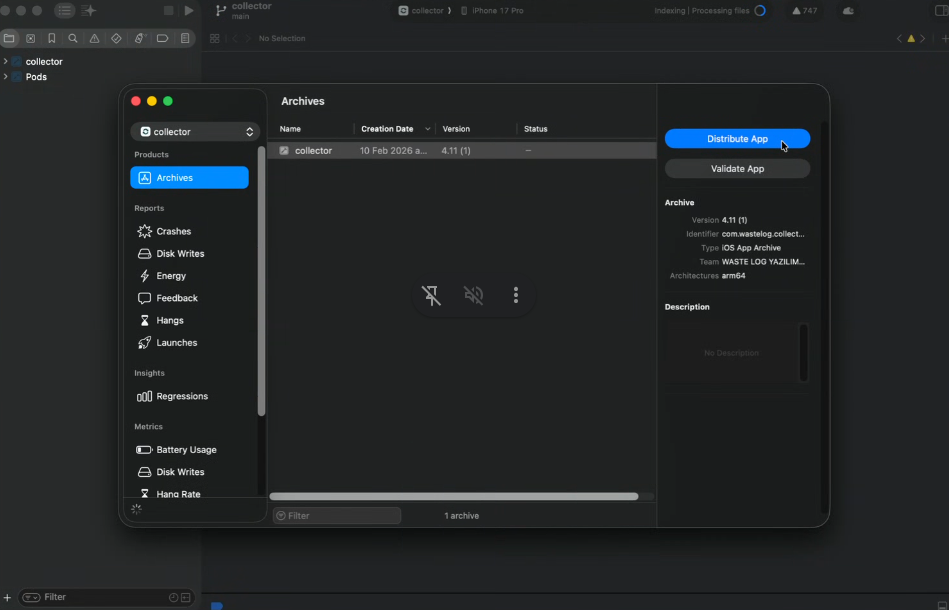
- For production builds, select App Store; for development (dev) builds, select Testflight.
- After opening the project, select your app.
With this guide, you can set up your iOS development environment, build, and run your app. For more detailed information and the Android setup guide, visit here.