Android Installation and Android App Development Guide
This section explains how to set up the Android development environment and build processes for your React Native application.
Prerequisites
- Java Development Kit (JDK): OpenJDK 17 (openjdk-17-jdk) must be installed on your system for Android development. Version 17 or higher is recommended.
- Android Studio: Install Android Studio to run Android SDK and emulators. Use the Android SDK manager to install necessary packages.
- Node.js and npm: npm comes with Node.js. It is recommended to download and install the LTS (Long Term Support) version of Node.js from https://nodejs.org/en/download.
- Yarn: Yarn is used to manage dependencies within the project. Install it globally with
npm install -g yarn. - Project Dependencies: To install required modules, run the following command in your project directory terminal:
yarn install
About the android-cli.js File
The android-cli.js file in your project root is a custom command line helper tool designed to facilitate your Android mobile development workflows.
CLI Interface:
Welcome to the Android Mobile CLI!
Do you want to (r)un, (b)uild, (c)lean, check (v)ersion, or (o)pen existing build?
(r)un Option
Used to run the app on a connected device or emulator.
- Development Mode (dev):
yarn react-native run-android --mode=developmentdebug --appId com.wastelog.producers.development - Production Mode (prod):
yarn react-native run-android --mode=productiondebug --appId com.wastelog.producers
To run the app, follow these steps in your terminal:
- Run the command
node android-cli.js - Press
(r)to select the run option - To watch changes and view on emulator or connected physical device, open another terminal and run
yarn start - If the app does not load initially, press
rin the metro terminal to reload
(b)uild Option
Generates binary files in APK or AAB format.
The following screen will appear during the build:
Current development version:
Version Code: 215
Version Name: 3.32

Do you want to increment the version code? (y/n): y
Do you want to update the version name? (y/n): n
- Version Code acts as a unique ID for Android and must always increase with each build.
- When moving to a production release, the version should be updated, and the Version Name must be incremented.
- The version number used in the project should also be updated manually by searching the iOS config files under version info.
- Pre-build Cleanup:
Clean the following folders manually or using Node.js fs.rmSync:rm -rf android/.gradle
rm -rf android/.kotlin
rm -rf android/build
rm -rf android/app/.cxx
rm -rf android/app/build - Build Process:
- dev mode + apk:
cd android && ./gradlew clean assembleDevelopmentRelease - prod mode + apk:
cd android && ./gradlew clean assembleProductionRelease - dev mode + aab:
(Version info in build.gradle is updated via script as described above)cd android && ./gradlew clean bundleDevelopmentRelease - prod mode + aab:
(Version info in build.gradle is updated via script as described above)cd android && ./gradlew clean bundleProductionRelease
(c)lean Option
Thoroughly cleans node_modules and native cache folders:
yarn react-native-clean-project
(o)pen Option
Opens the built output in the operating system's file explorer.
- Windows:
explorer "android\app\build\outputs\apk\developmentRelease" - macOS:
open "android/app/build/outputs/apk/developmentRelease" - Linux:
xdg-open "android/app/build/outputs/apk/developmentRelease"
(v)ersion Option
Checks the current version information. (Shell command is not run; the android/app/build.gradle file is read and version info is extracted via regex.)
With this guide, you can set up your Android development environment and build and run your application.
Play Store aab File Upload
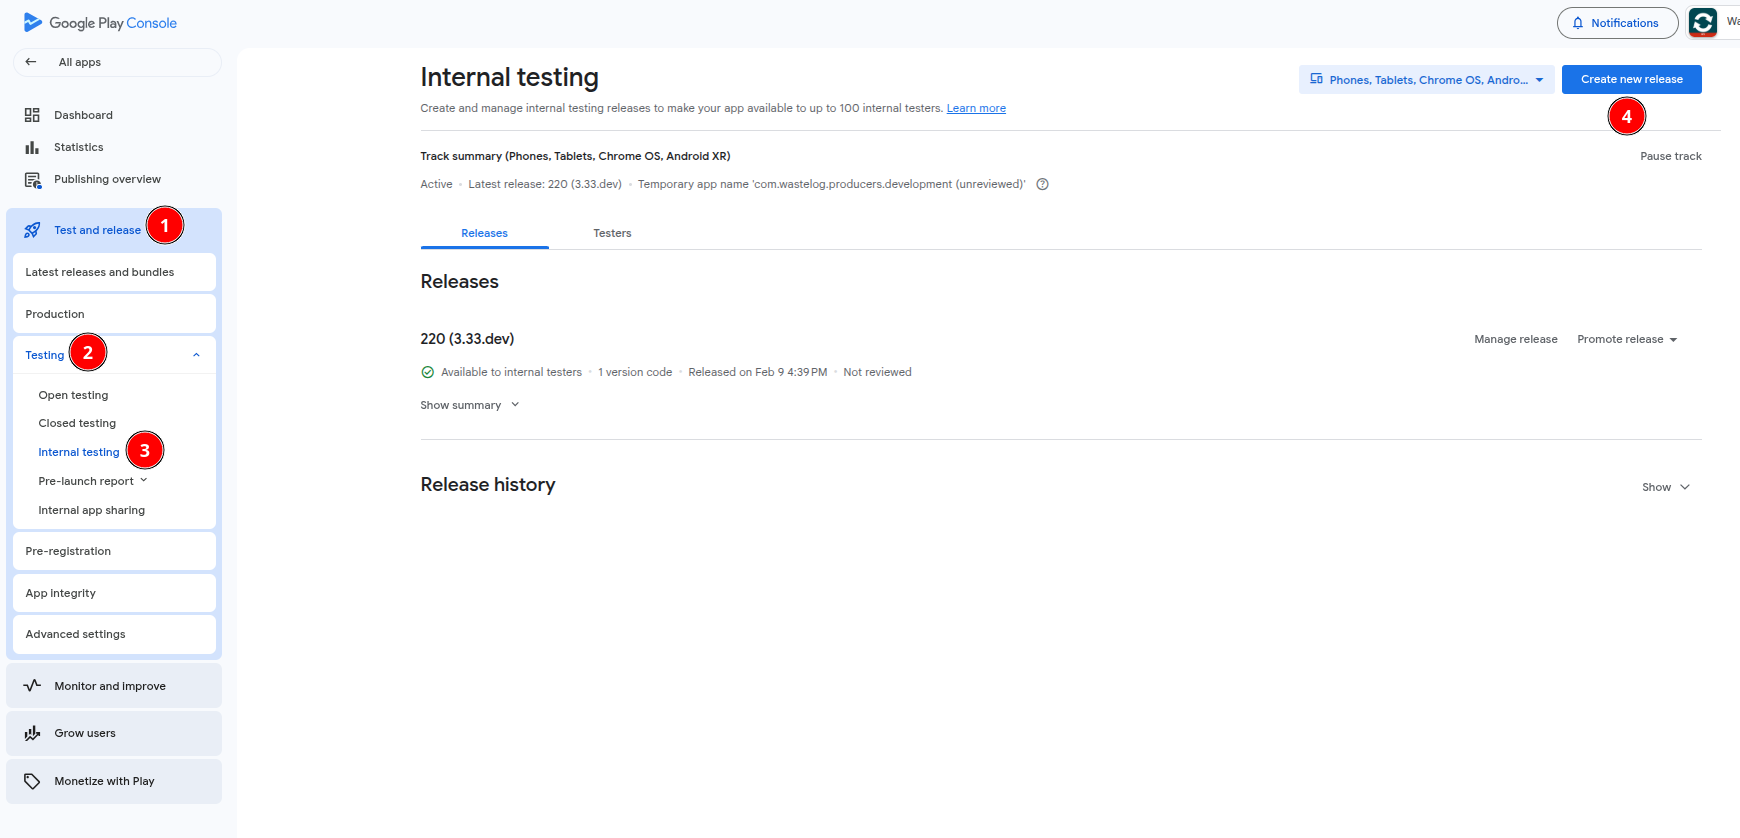
To upload your aab file for your test release in Google Play Console, follow the steps below:
- Go to Test & Release > Testing > Internal Testing
- Click the "Create new Release" button
The following image shows this stage:
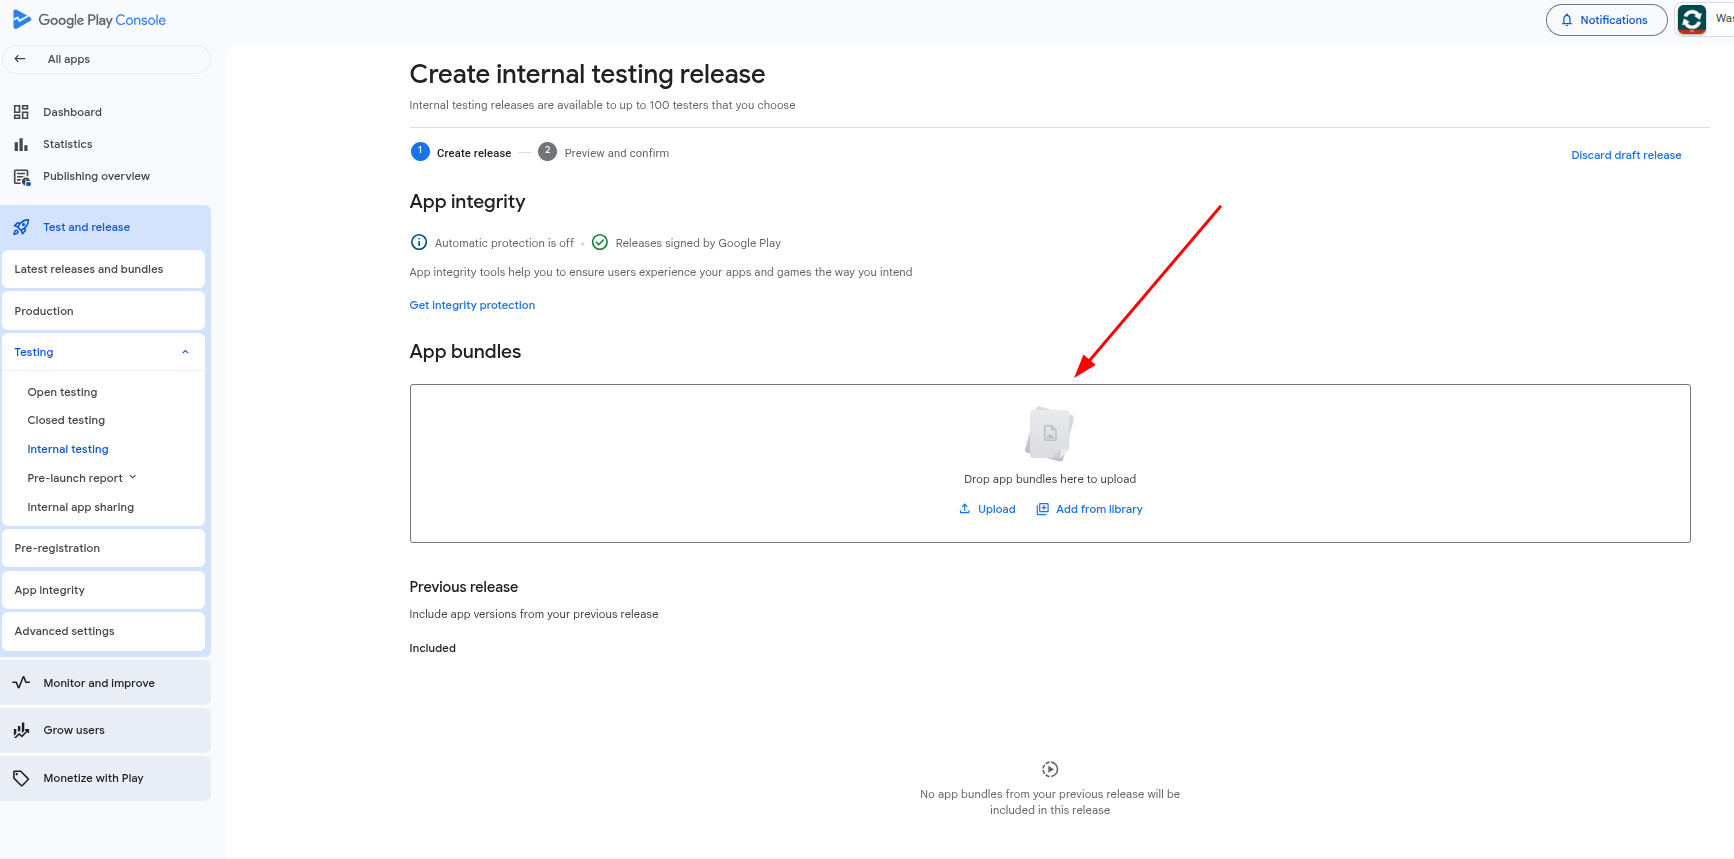
- Drag and drop your
aabfile into the upload area - Click "Next" and after filling in the required information, use the "Release" button to publish the release
After the upload completes, your release will be available for internal testers to test.
The image below illustrates this step:
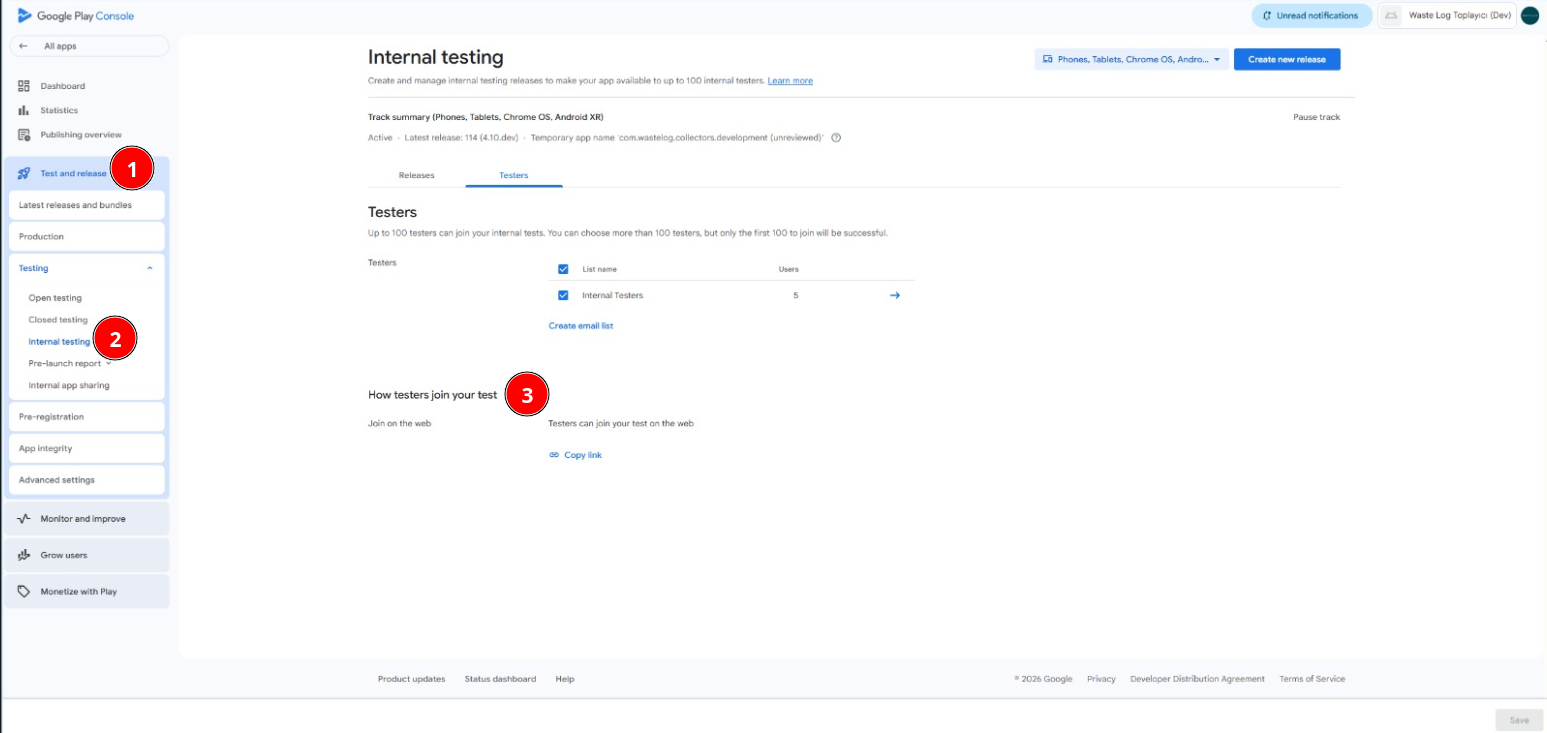
Adding Play Store Testers
To add testers to your development projects via the Google Play Console, follow these steps:
- Navigate to Test & Release > Testing > Internal Testing
- Find the Join link on the web and share it with your testers
- Testers can join the testing program using this link
Below is an image illustrating these steps: